
Selection of the system type
For updating the auth code of the GNSS-Receiver it is important to define the system version and type you are using.
Please select the system type you want to execute an Auth Code update.


Activation via Ethernet 3 Interface

To update the Auth code on the internal GNSS-Receiver the following components are needed:
• Computer with a Ethernet Interface
• ADMA Power cable
• ADMA Ethernet cable
• Current GNSS-Receiver firmware (located in the ADMA Suite)
To access the GNSS-Receiver connect the provided ADMA Ethernet cable from your ADMA Ethernet 3 Interface to your PC and power up the ADMA.
Updating the Auth Code
Connect the Ethernet Cable to the Ethernet 1 Interface and open up the ADMA Webinterface. Copy the GNSS-Receiver PSN.

• Open 192.168.88.30 in the web browser
• Go to the menu System at the upper right corner
• Copy the GNSS-Receiver PSN

Connect the Ethernet Cable to the Ethernet 3 Interface of the ADMA and open up the Webinterface of the Novatel GNSS-Receiver. Head to the Device with the PSN as password.

• Open 192.168.88.40 in the web browser
• Open Device and paste the PSN of the Receiver and Log in

Go to the menu Device and select Details.

Then paste the new Auth Code into the related box and click Apply.

Activation via Serial Interface
To update the Auth Code the internal GNSS-Receiver the following components are needed:
• Computer with a serial interface or a USB to RS232 adapter
• ADMA Power cable
• ADMA Ethernet cable
• ADMA AUX cable
• Current GNSS-Receiver firmware and the Novatel Application Suite (located in the ADMA Suite)
Wiring
To access the GNSS-Receiver connect the provided ADMA AUX to SubD9-Cable with the serial interface of your computer.

Setup and Configuration
At first save the current settings of the ADMA to file as backup. After that, set default settings.

Make sure, that Autostart is off.

Depending on the used Interface, one of the following settings must be set:
AUX Interface
• 2️⃣ DATA LINK: AUX Baud rate 115200ㅤㅤㅤㅤㅤㅤㅤㅤㅤㅤㅤㅤㅤㅤㅤㅤ

MODEM Interface
• 5️⃣ AUX SYSTEM: DGNSS Preset user defined, Source Modem Port und Baud rate 115200

Updating the Auth Code
Unzip the firmware update files and start the Novatel Application Suite (Install the Software if not already available).
• Unzip
• Start Novatel Application Suite
Open Setup & Monitor.

Add Device.

Connect to the device.
• Type in a connection name
• Select Serial
• Select the COM Port of your PC. (If unknown, look it up in the windows device manager)
• Select Baud Rate Auto
• Add the Receiver

Open the connection.

Go to Device / Details and fill in the new Auth Code in the related box. Then click Apply.

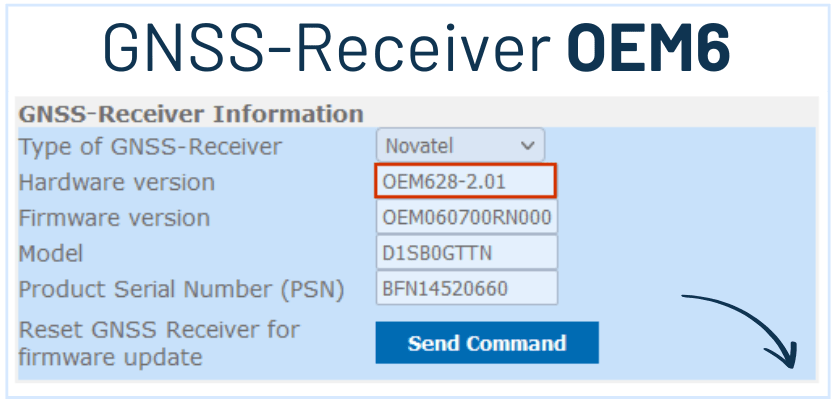
Checking the new Auth Code
To check the successful Auth Code Update, connect to the ADMA Webinterface. Start Measurement and open the menu SYSTEM, GNSS receiver Information. Check the Model of the GNSS-Receiver Information.
